Dual System Minimal Installation Guide
Download Ubuntu System Image
Go directly to https://cn.ubuntu.com/download to download the required image.
Generally, we download the LTS version (Long-Term Support version), which is relatively stable.
Create a Bootable USB Drive
Download the bootable disk creation tool: Rufus, and prepare a USB drive with a capacity of 4GB or more.
Select the bootable USB drive and the image to be burned, and choose the other configurations as shown in the following figure:
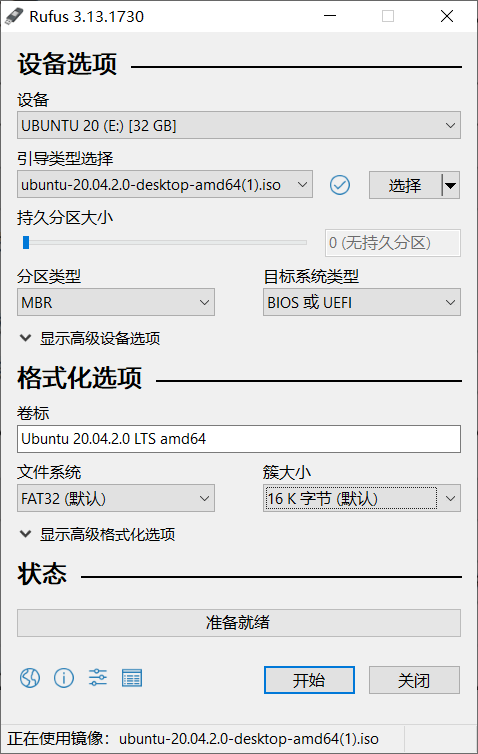
If there are subsequent pop-up steps, choose the default options.
Allocate Disk Space for Ubuntu
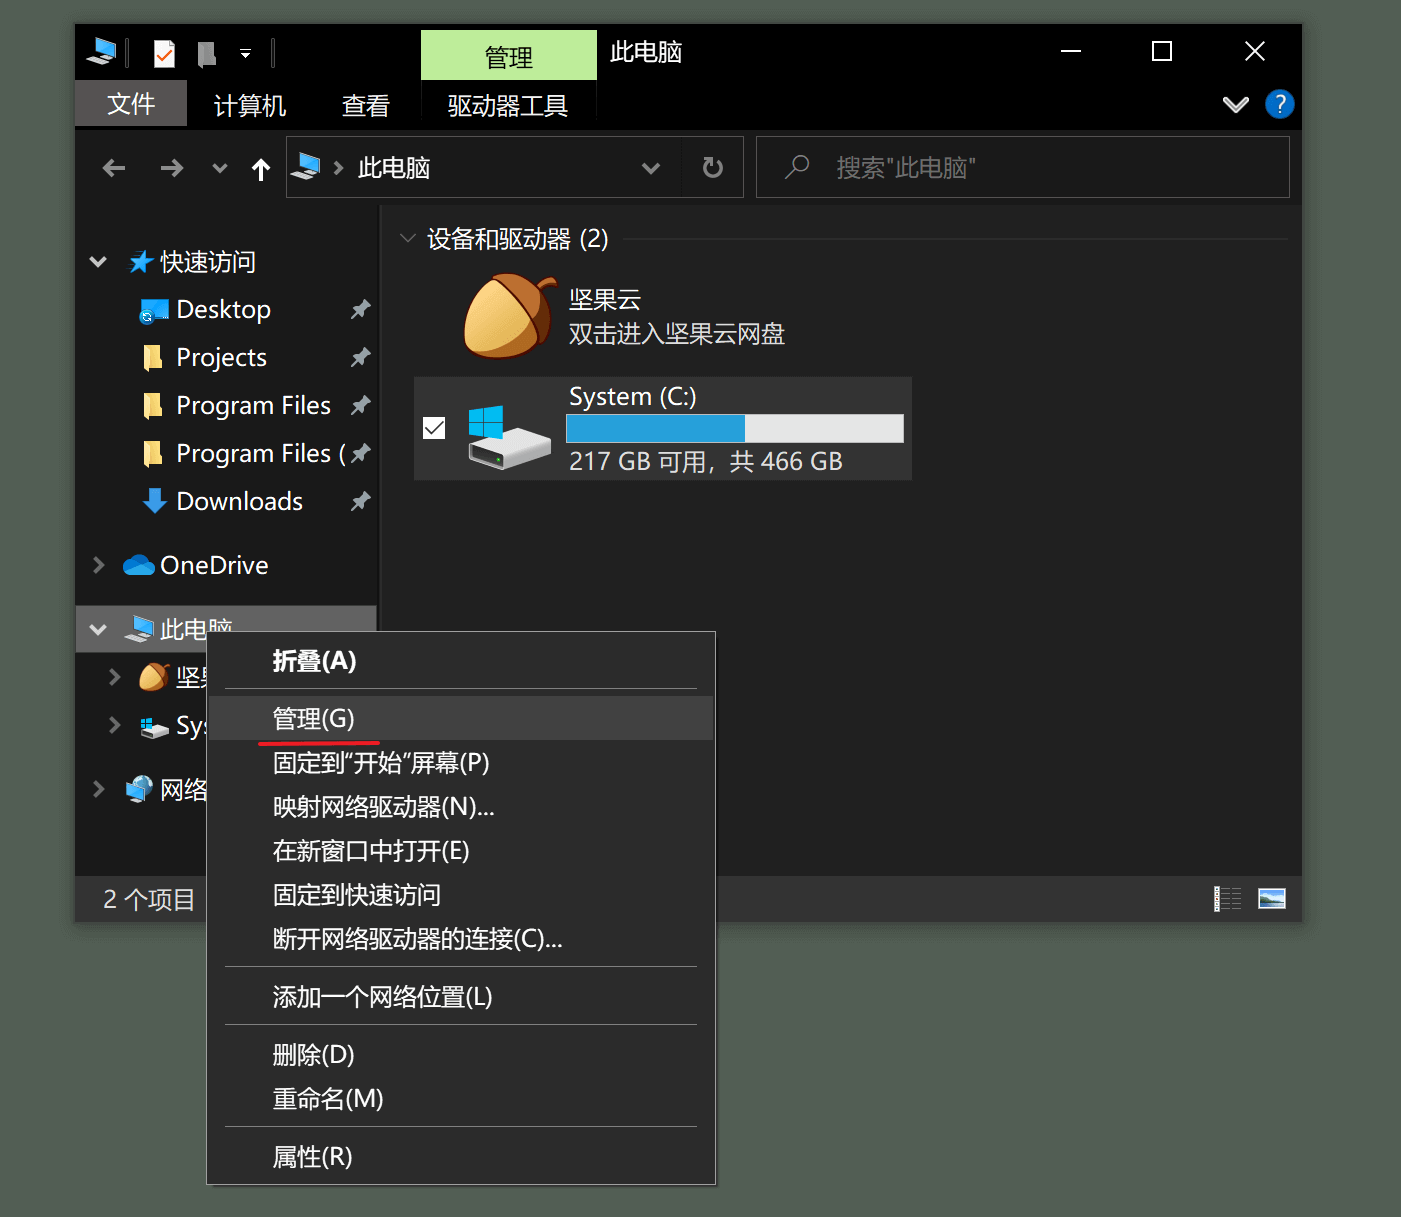
Right-click on This PC - Manage
Select the disk that needs to allocate space for Ubuntu, right-click on it, and choose Shrink Volume:
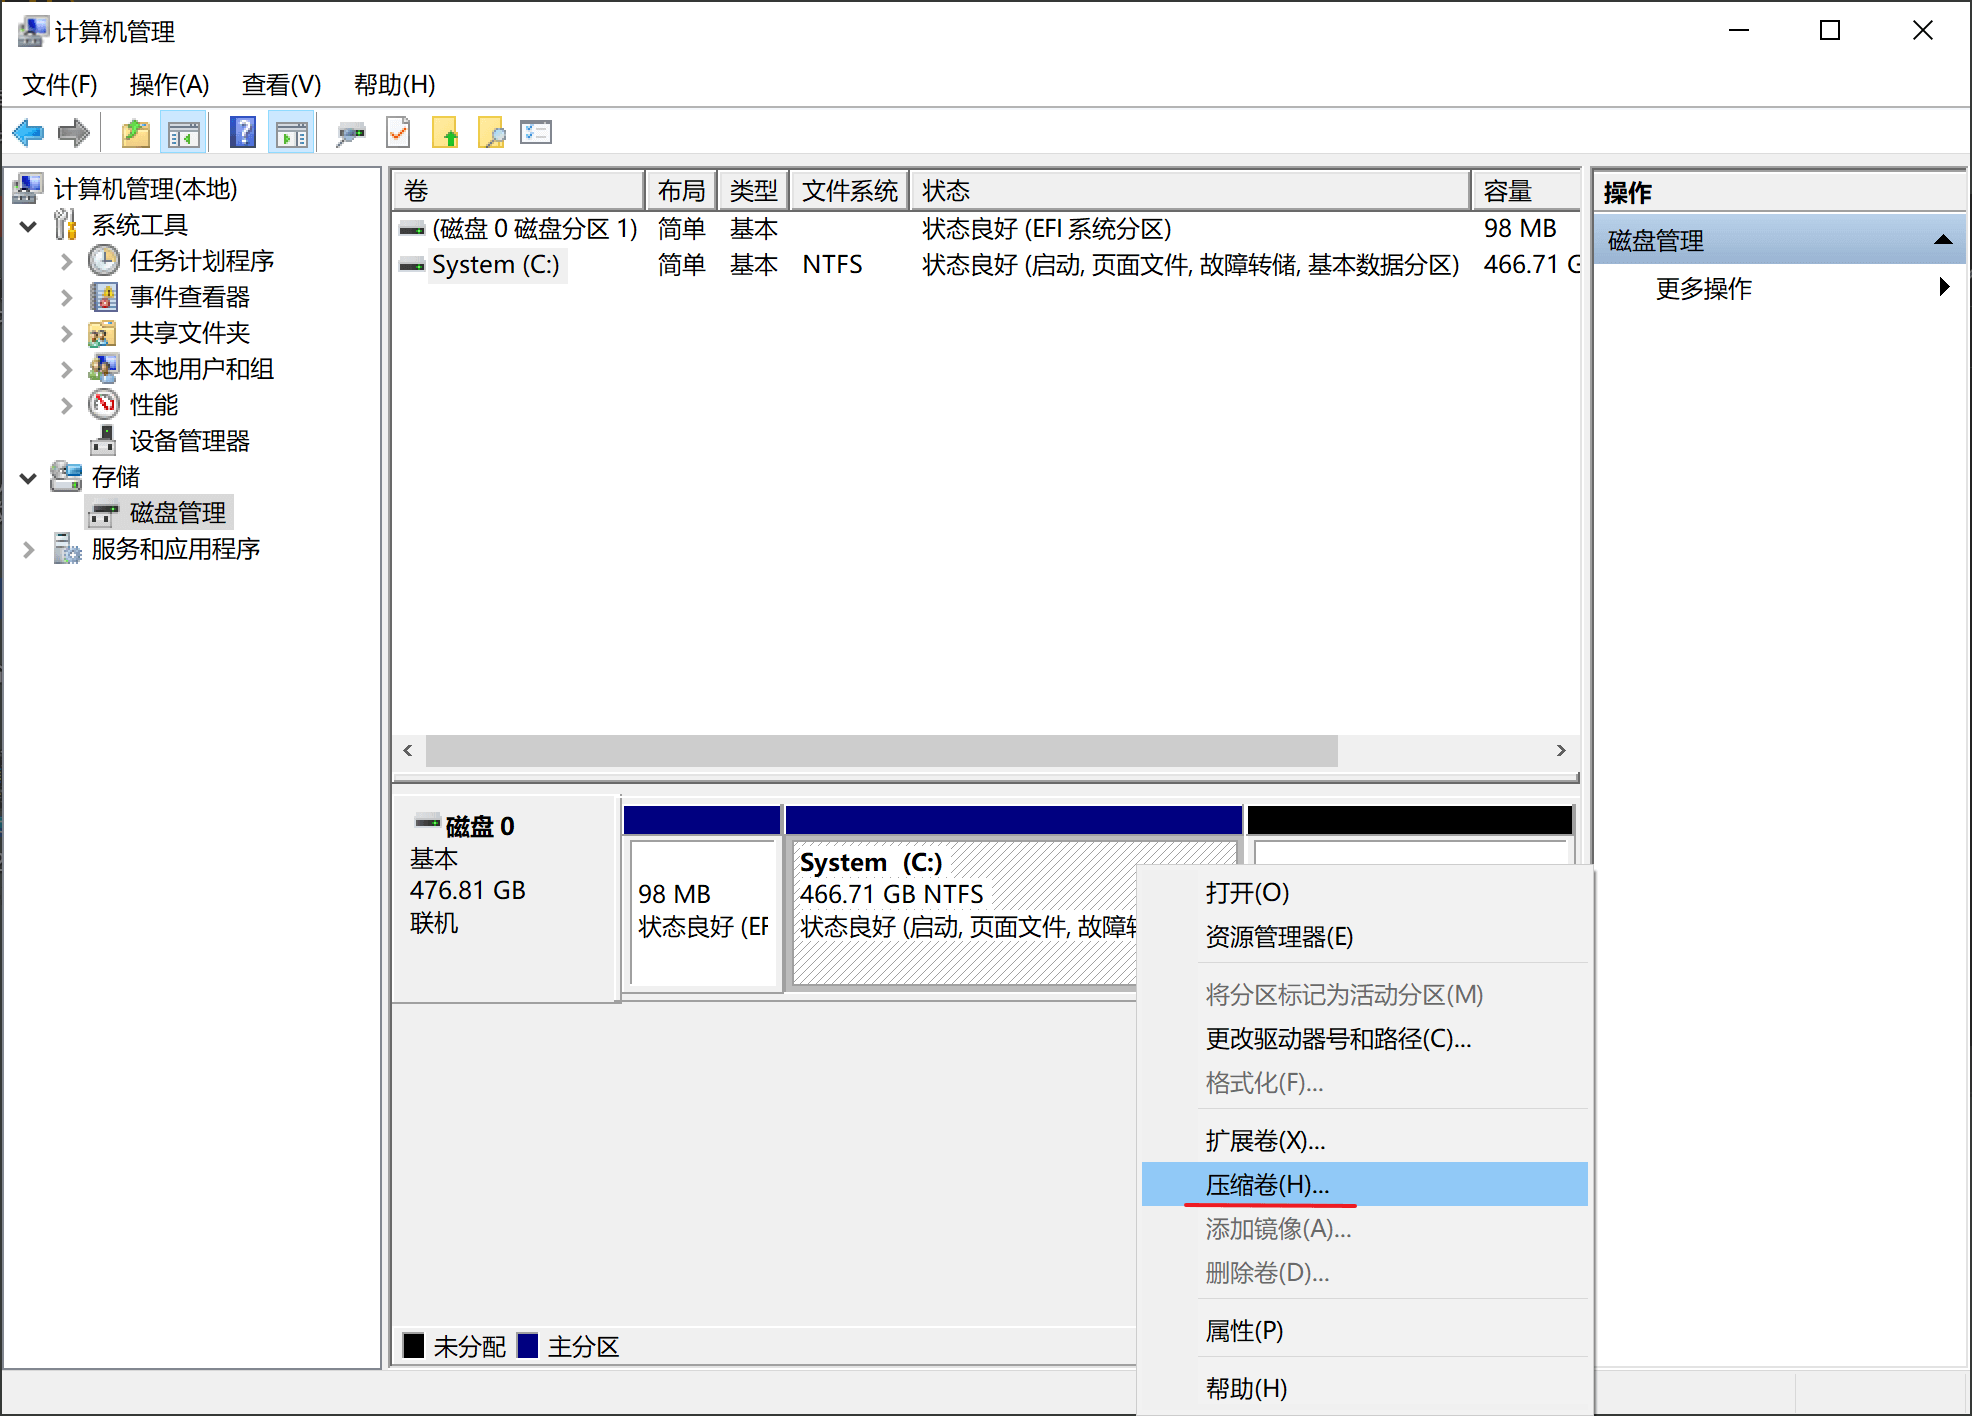
Generally, we allocate 50 GB to 100 GB of capacity for Ubuntu, which is equivalent to 56325 MB to 102400 MB. Enter the designated capacity in the Enter the amount of space to shrink in MB field, click OK, and the allocated space will appear in black and show the status as Unallocated.
Install the System
Insert the USB drive and restart the computer. During the startup process, enter the BIOS (the operation to enter the BIOS varies for different brands of computers, for example, mine is pressing F12), and select the Install Ubuntu option.
It is recommended not to connect to the internet during the installation process. Uncheck the Download updates while installing Ubuntu option. Update the system after the installation is completed to avoid slowing down the installation progress.
On the Installation type page, select Something else, and then select the disk with the largest free space, click + to create a partition.
First, we create the /boot partition. The /boot partition is used to store the system kernel and generally requires more than 1 GB of space. So, in the Size column, enter 1024 MB, and in the Mount point field, enter /boot, then click OK.
Next, create the / partition. Similar to the above, select the free disk, create a partition, and leave the size as the remaining space. In the Mount point field, enter /, then click OK.
The next important step is to select the device where the installation bootloader will be placed. Choose the device corresponding to the /boot partition. This way, the bootloaders of Windows and Ubuntu will not conflict with each other.
Next, select the time zone, and the default option is fine. On the Who are you? page, set your personal information, and pay attention to keeping the username and password relatively simple.
After removing the USB drive, restart the computer, enter the BIOS, and select Ubuntu to boot.
For post-installation operations, you can refer to the article Ubuntu Configuration Notes.
References and Acknowledgements
- Windows10+Ubuntu18.04 Dual System Quick and Easy Installation Guide
-
Original: https://wiki-power.com/
-
This post is protected by CC BY-NC-SA 4.0 agreement, should be reproduced with attribution.
This post is translated using ChatGPT, please feedback if any omissions.