Mecanum Wheel Car
- How to build a remote-controlled Mecanum wheel car.
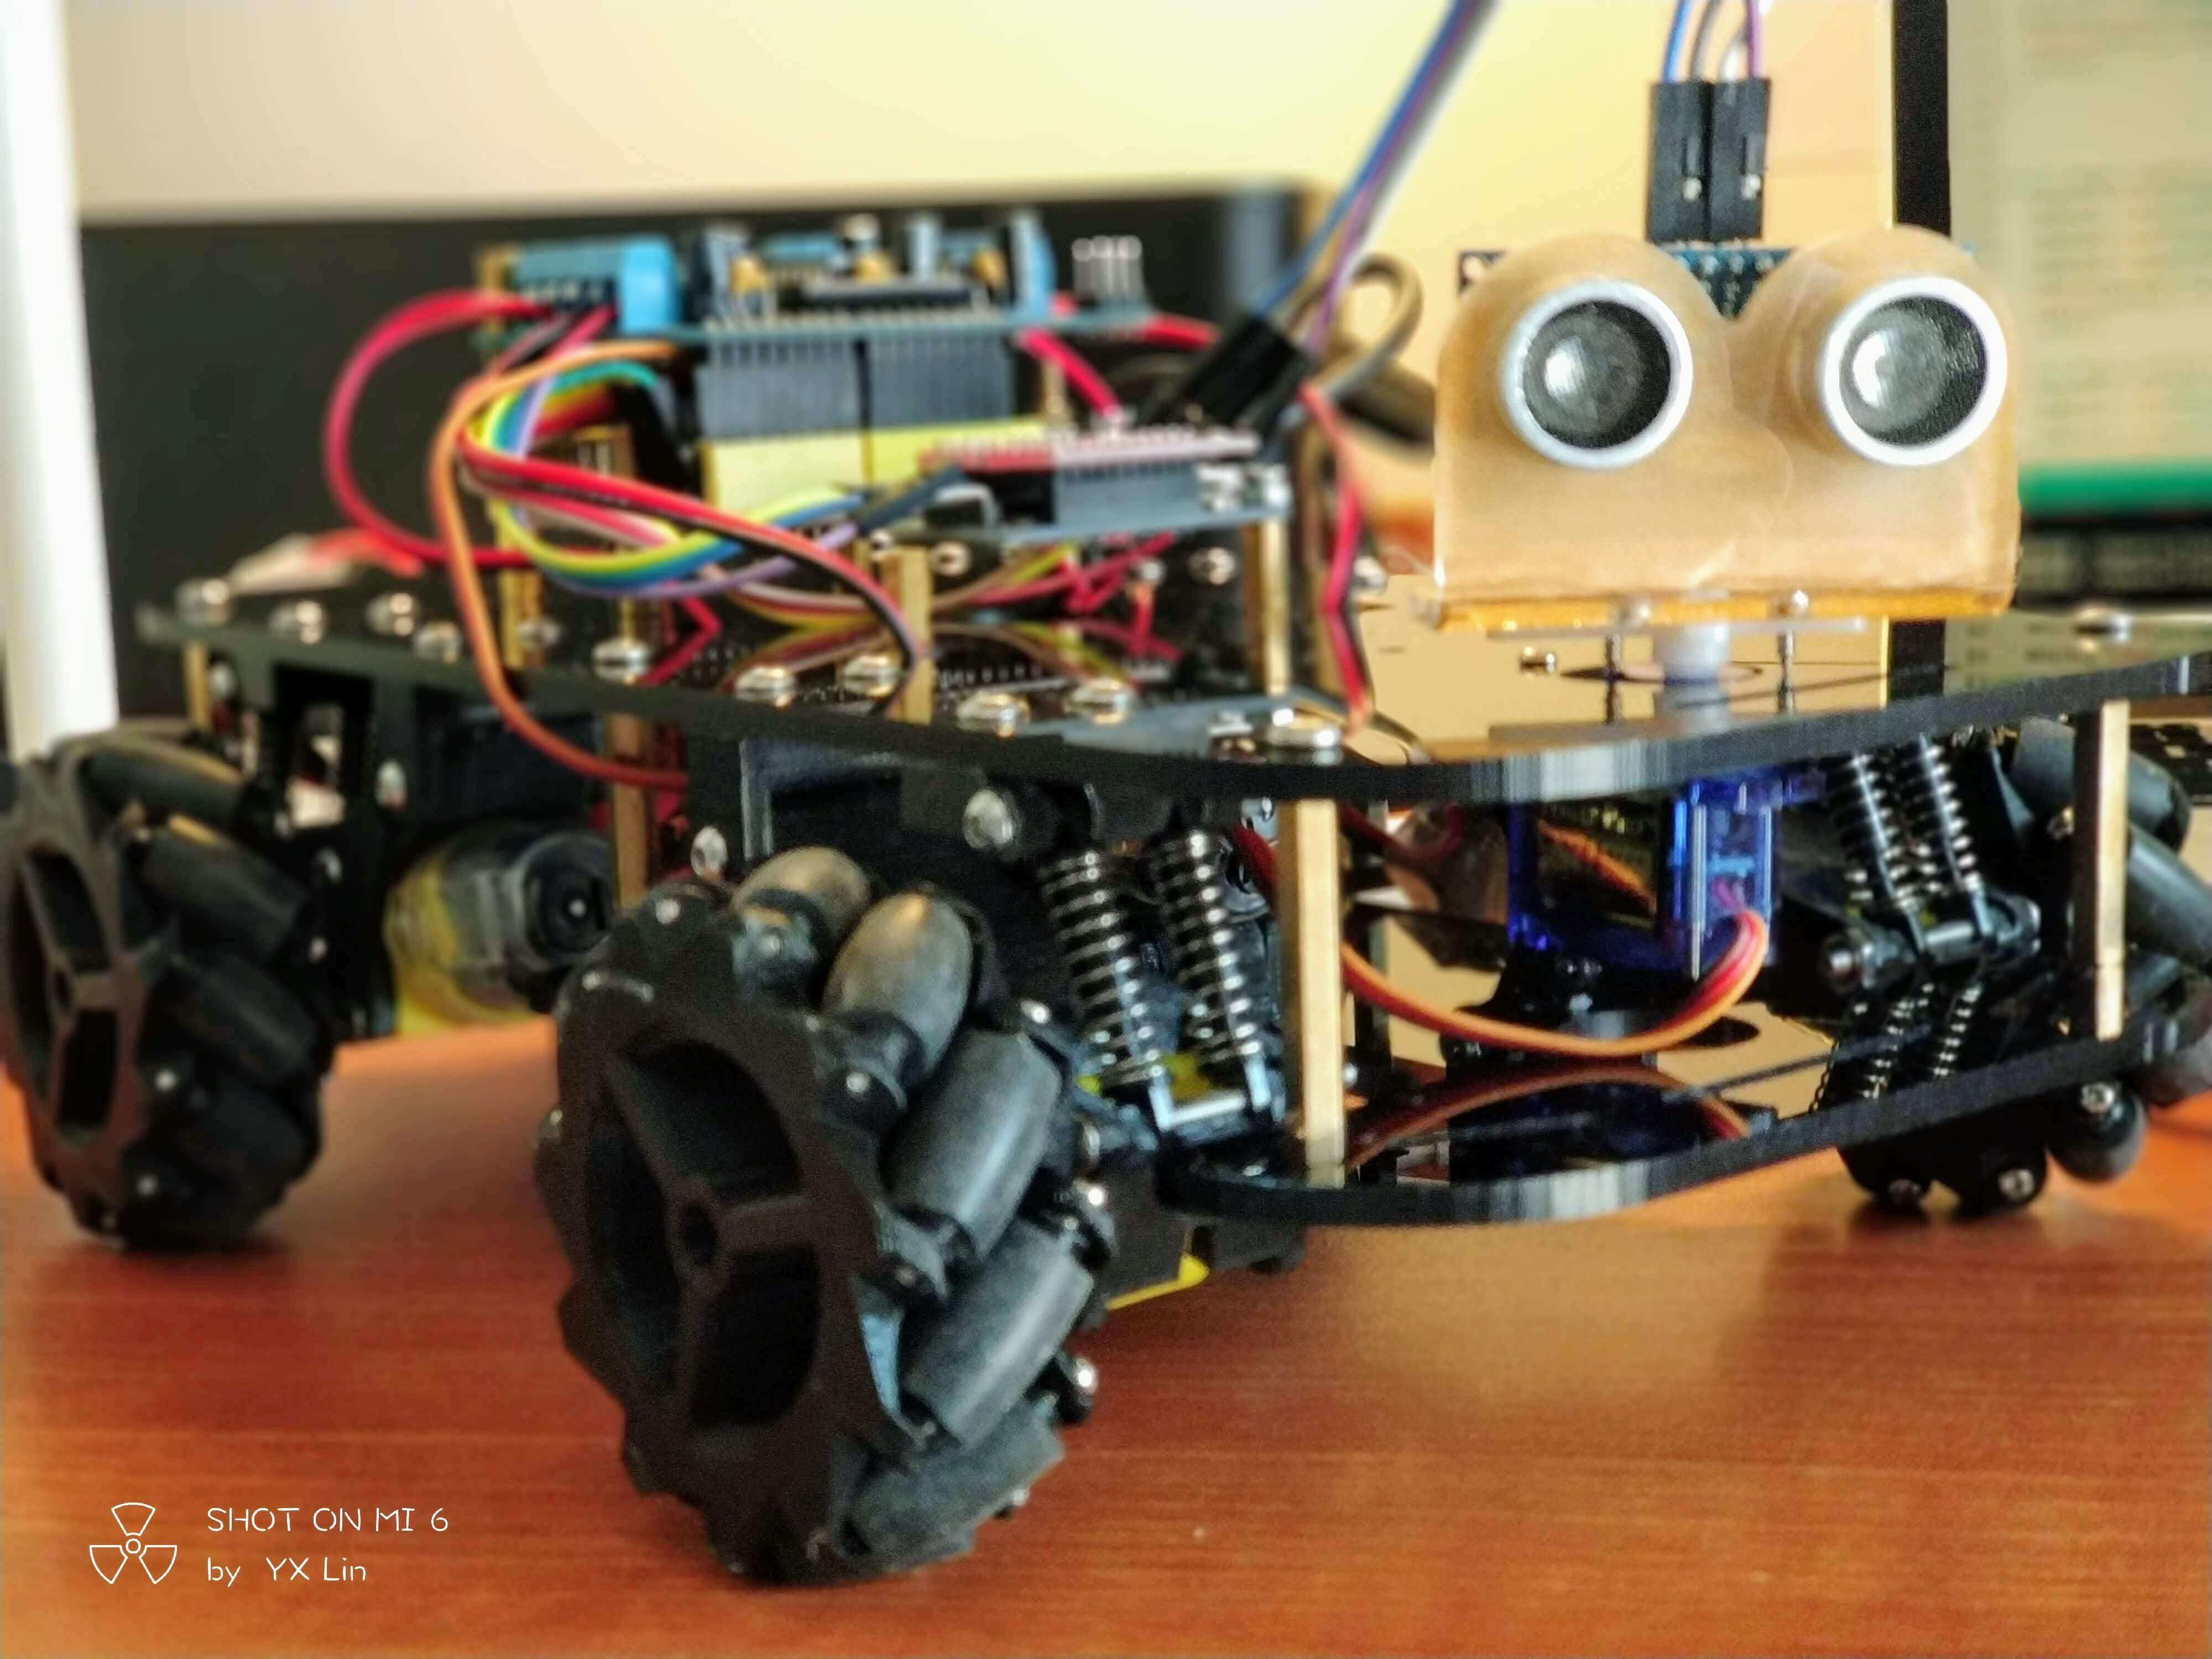
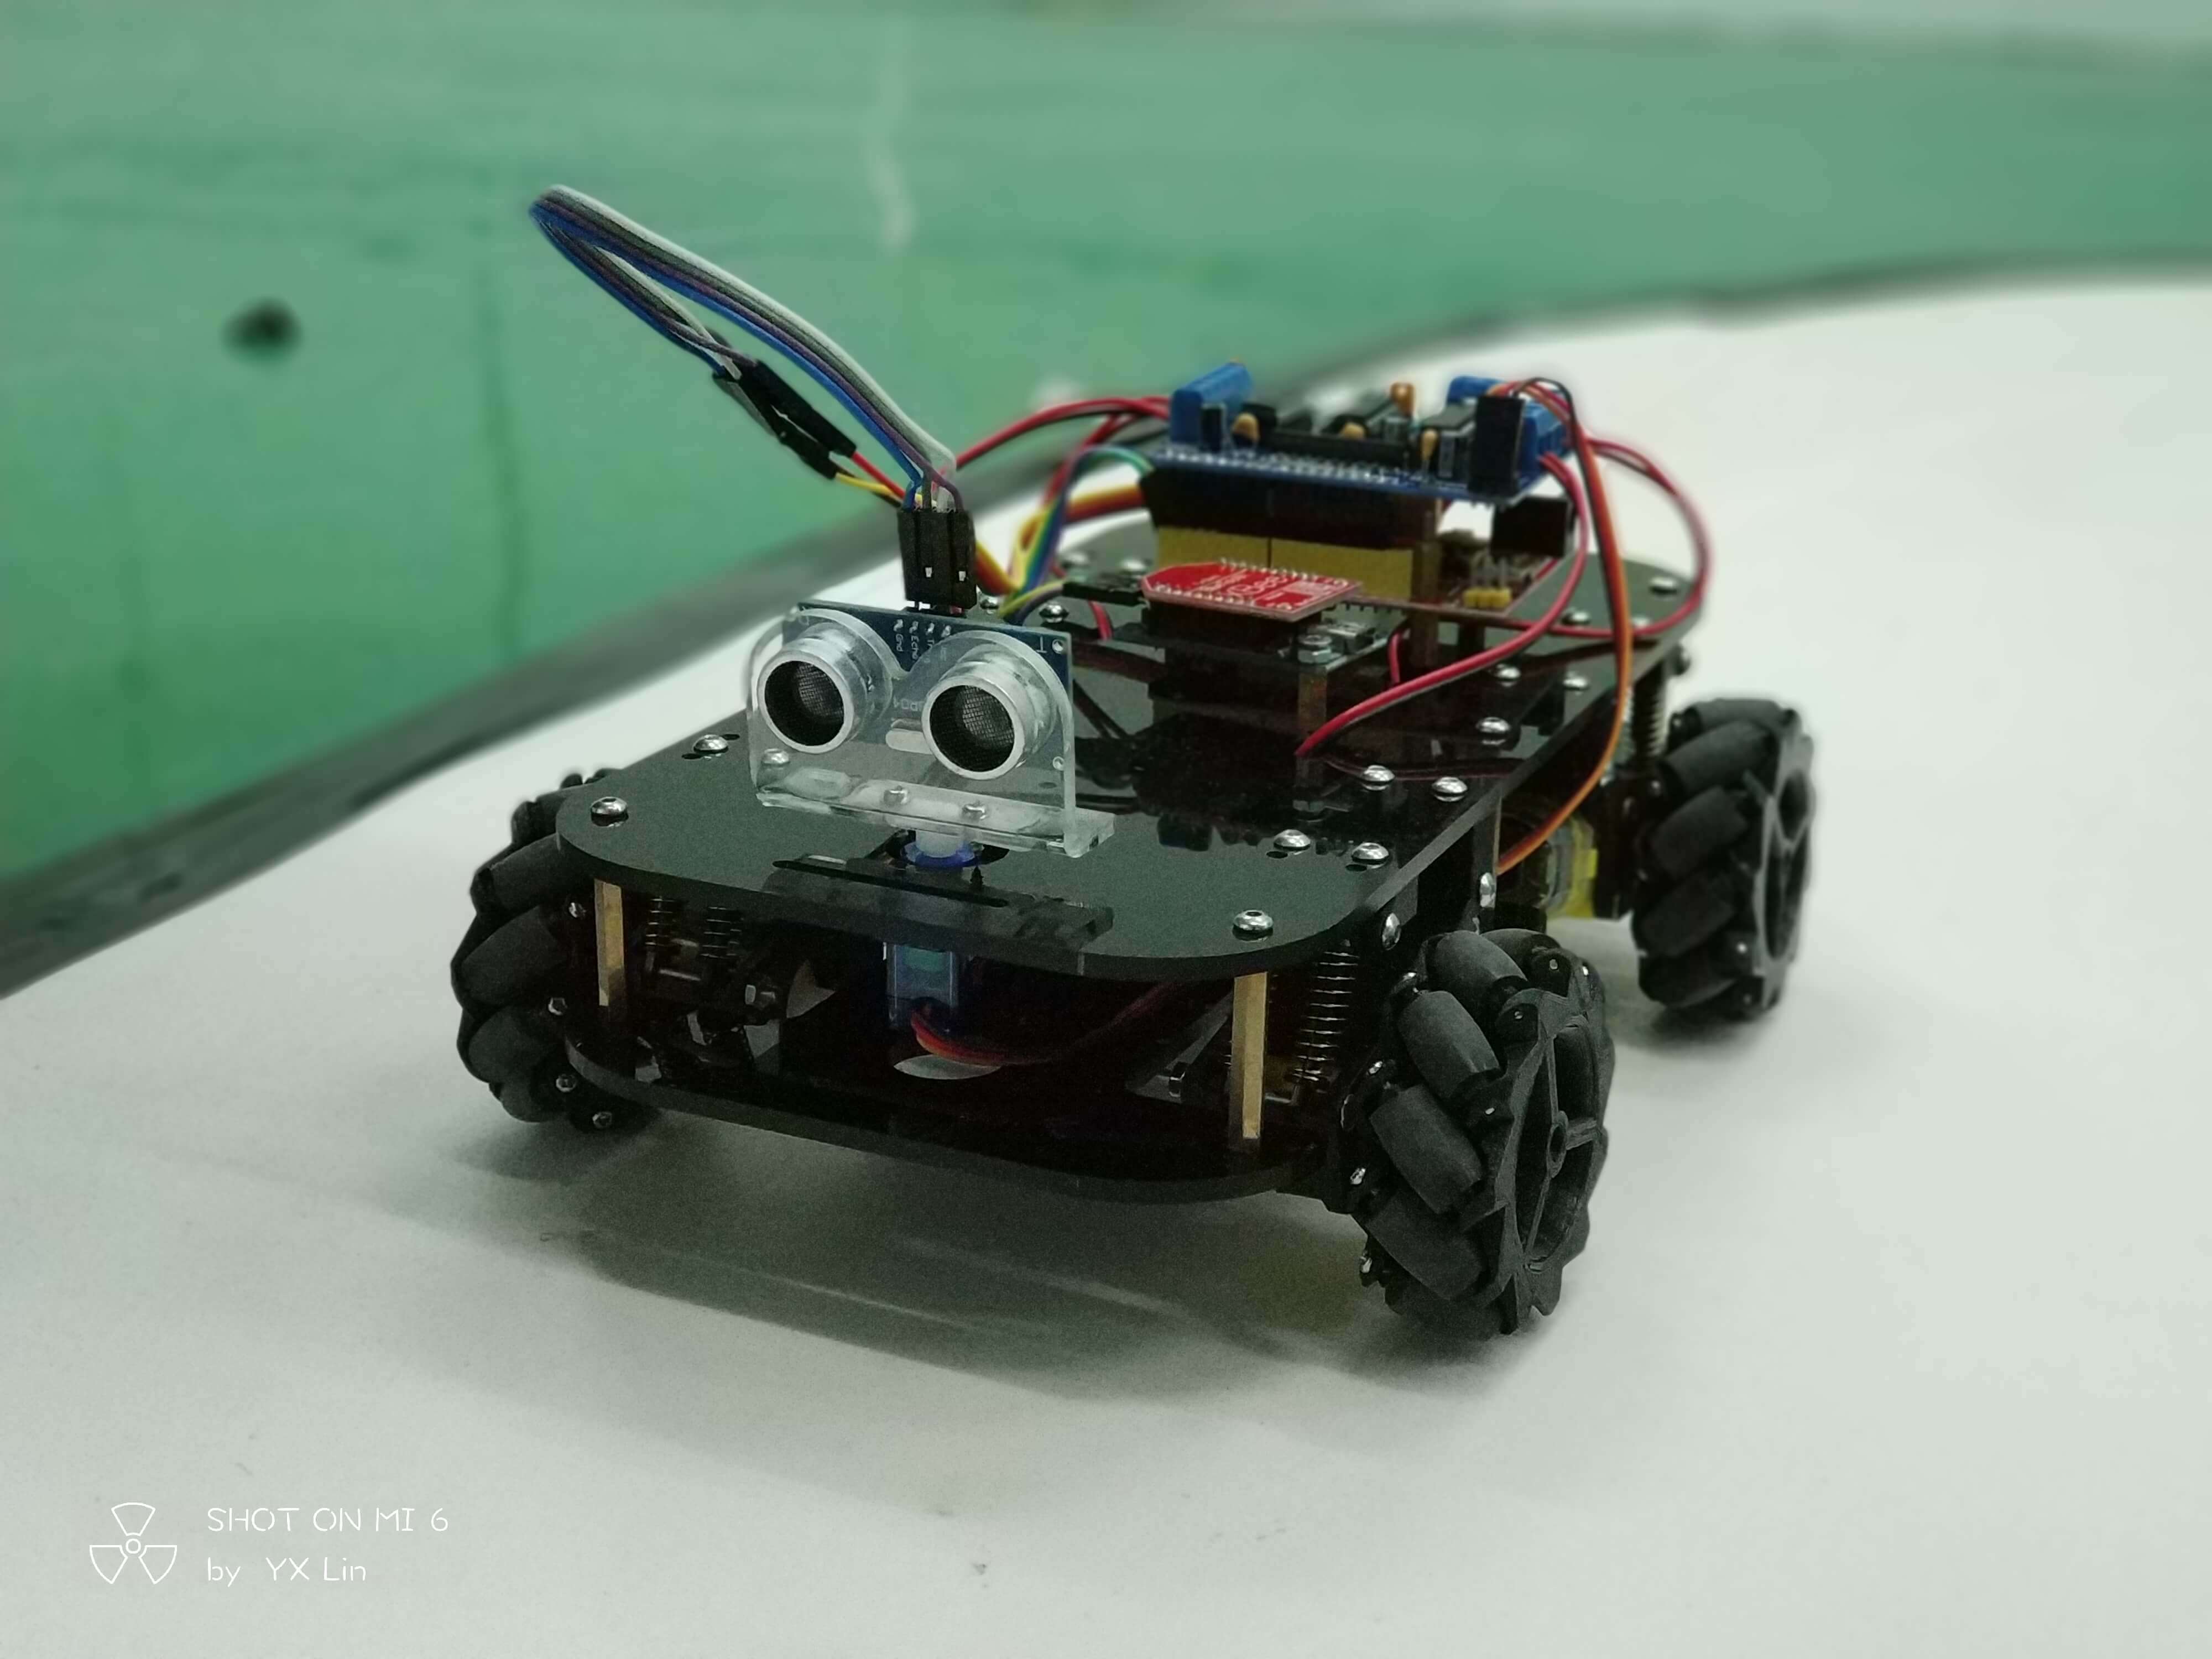
In the embedded systems course, we were required to design a car chassis, so I built a Mecanum wheel car.
Principle
Mecanum Wheel:
The characteristic of a Mecanum wheel drive is that it can move smoothly in all directions, adapting to narrow or difficult terrain. The disadvantages are high power loss, expensive, difficult to process, difficult to maintain, and relatively short lifespan.
Steering Principle:

Component List
| Name | Reference Link |
|---|---|
| Mecanum Wheel Car Chassis (with TT Motor) | Link |
| Arduino UNO | N/A |
| L293D Motor Driver | N/A |
| HC-06 Bluetooth Module | N/A |
| 9g Servo Motor | N/A |
| HC-SR04 Ultrasonic Sensor | N/A |
| 11.1V Lithium Battery | N/A |
Code Implementation
The Arduino UNO is used as the main controller for the car.
Project Files: My-Arduino-projects / Mecanum Wheel Car
L293D Library: AFMotor.rar
Code:
//by YX Lin
#include <AFMotor.h> //L293D driver library
#include <Servo.h> //Servo library

#define SR04_Trig 11
#define SR04_Echo 12

int distance = 0;
int delay_time = 300;
int micro_delay_time = 100;
int pos = 0;
int motor_speed = 200;

AF_DCMotor motor1(1);
AF_DCMotor motor2(4);
AF_DCMotor motor3(3);
AF_DCMotor motor4(2);

Servo myservo;

void setup() {
  Serial.begin(9600);
  myservo.attach(2);
  motor1.setSpeed(motor_speed);
  motor2.setSpeed(motor_speed);
  motor3.setSpeed(motor_speed);
  motor4.setSpeed(motor_speed);
  pinMode(SR04_Trig, OUTPUT);
  pinMode(SR04_Echo, INPUT);
  //serve();
}

void loop() {
  if (Serial.available()) {
    Serial.println("Hello");
    char x = Serial.read();
    if (x == 'W') move_forward();
    if (x == 'S') move_backward();
    if (x == 'D') move_right();
    if (x == 'A') move_left();
    if (x == 'E') right_front();
    if (x == 'Q') left_front();
    if (x == 'C') rotate_right();
    if (x == 'Z') rotate_left();
    if (x == 'X') off();

    if (x == 'F') serve();
    if (x == 'V') sr04(); //ultrasonic distance measurement

    Serial.println("ok");
  }
  delay(5);
}

void move_forward() {
  motor1.run(FORWARD);
  motor2.run(FORWARD);
  motor3.run(FORWARD);
  motor4.run(FORWARD);
  delay(delay_time);
  off();
}

void move_backward() {
  motor1.run(BACKWARD);
  motor2.run(BACKWARD);
  motor3.run(BACKWARD);
  motor4.run(BACKWARD);
  delay(delay_time);
  off();
}
void move_right() {
  motor1.run(FORWARD);
  motor2.run(BACKWARD);
  motor3.run(FORWARD);
  motor4.run(BACKWARD);
  delay(delay_time);
  off();
}
void move_left() {
  motor1.run(BACKWARD);
  motor2.run(FORWARD);
  motor3.run(BACKWARD);
  motor4.run(FORWARD);
  delay(delay_time);
  off();
}
void right_front() {
  motor1.run(FORWARD);
  motor2.run(RELEASE);
  motor3.run(FORWARD);
  motor4.run(RELEASE);
  delay(delay_time);
  off();
}
void left_front() {
  motor1.run(RELEASE);
  motor2.run(FORWARD);
  motor3.run(RELEASE);
  motor4.run(FORWARD);
  delay(delay_time);
  off();
}
void rotate_right() {
  motor1.run(FORWARD);
  motor2.run(BACKWARD);
  motor3.run(BACKWARD);
  motor4.run(FORWARD);
  delay(micro_delay_time);
  off();
}
void rotate_left() {
  motor1.run(BACKWARD);
  motor2.run(FORWARD);
  motor3.run(FORWARD);
  motor4.run(BACKWARD);
  delay(micro_delay_time);
  off();
}
void off() {
  motor1.run(RELEASE);
  motor2.run(RELEASE);
  motor3.run(RELEASE);
  motor4.run(RELEASE);
}
void serve() {
  for (pos = 0; pos <= 180; pos += 5) { // goes from 0 degrees to 180 degrees
    // in steps of 1 degree
    myservo.write(pos);              // tell servo to go to position in variable 'pos'
    delay(15);                       // waits 15ms for the servo to reach the position
  }
  for (pos = 180; pos >= 0; pos -= 5) { // goes from 180 degrees to 0 degrees
    myservo.write(pos);              // tell servo to go to position in variable 'pos'
    delay(15);                       // waits 15ms for the servo to reach the position
  }
}
void sr04() {
  digitalWrite(SR04_Trig, LOW); // send a low level to Trig
  delayMicroseconds(2);    // wait for 2 microseconds
  digitalWrite(SR04_Trig, HIGH); // send a high level to Trig
  delayMicroseconds(10);    // wait for 10 microseconds
  digitalWrite(SR04_Trig, LOW); // send a low level to Trig
  distance = ((float(pulseIn(SR04_Echo, HIGH)) * 17 ) / 100); // convert the echo time to millimeters and subtract the distance difference
}
if (distance < 9999 && distance > 0) {
  Serial.print("Distance: ");
  Serial.println(distance);
} else {
  Serial.println("Distance too large");
}
}
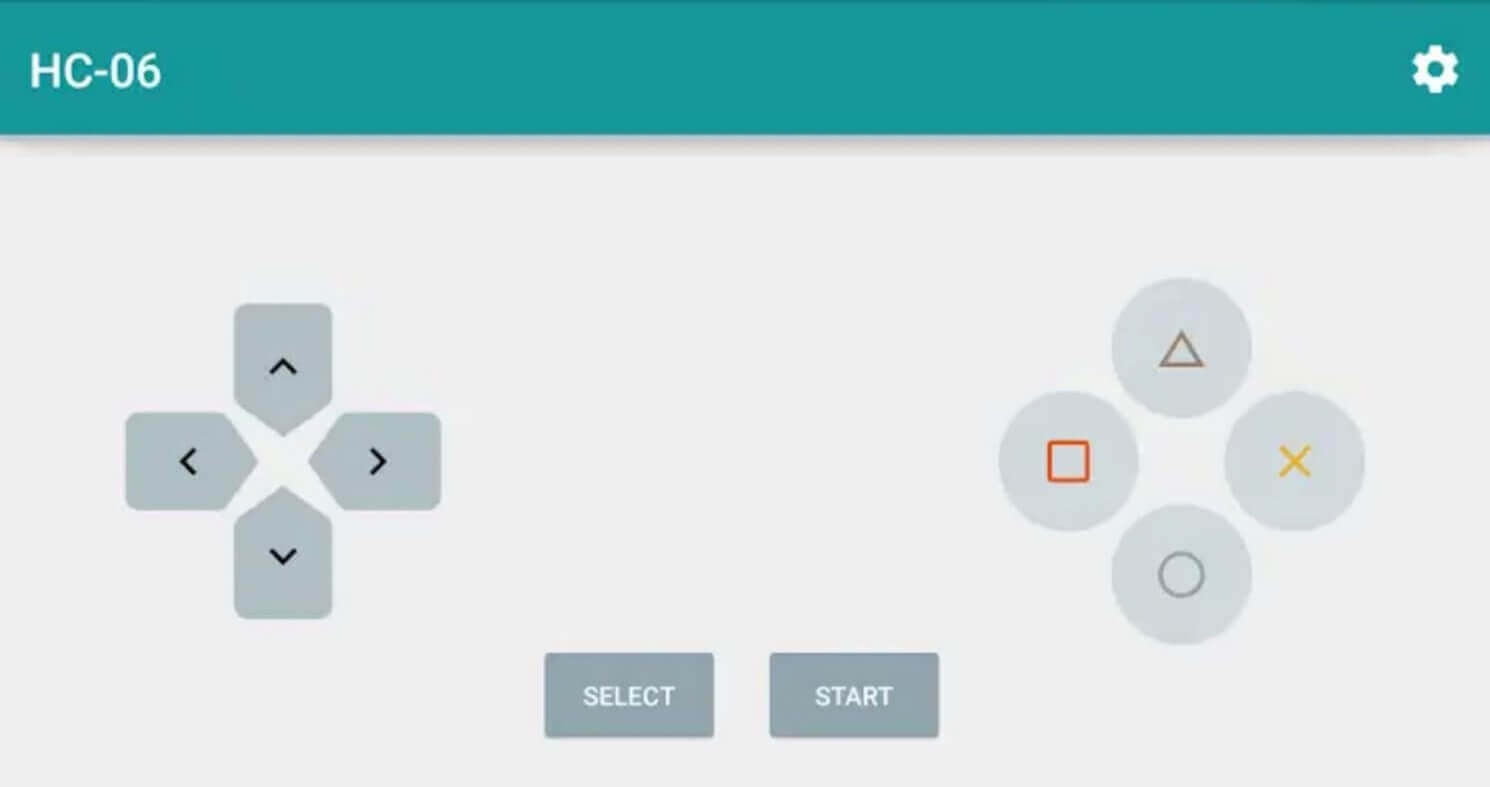
Bluetooth Remote Control: Download the Arduino bluetooth controller app, set the corresponding keys according to the code, and you can control it remotely.
FAQ
Q: Will there be any follow-up to the project? A: Yes, I plan to port the code to STM32 and implement remote control using a PS2 controller during the winter vacation.
Conclusion
The car can achieve basic functions overall, but there is a distance limitation and the Bluetooth control cannot be relatively smooth. It will be gradually optimized with future algorithms.
References and Acknowledgements
Original: https://wiki-power.com/ This post is protected by CC BY-NC-SA 4.0 agreement, should be reproduced with attribution.
This post is translated using ChatGPT, please feedback if any omissions.