HAL Library Development Notes - TIM Basic Timer
In STM32, there are three types of timers: basic timers, general-purpose timers, and advanced timers, which are used to handle various types of periodic tasks. In this article, I will provide a detailed introduction to the basic timers.
Basic Principles
The timers we commonly use can be classified into three categories: basic timers, general-purpose timers, and advanced timers. In the STM32F4 series microcontrollers, the corresponding timers are as follows:
- Basic Timers
- TIM6
- TIM7
- General-Purpose Timers
- TIM2-TIM5
- TIM9-TIM14
- Advanced Timers
- TIM1
- TIM8
- (SysTick Timer)
Usually, we use basic timers as timers and general-purpose timers to output PWM signals.
Characteristics of Basic Timers
In the STM32F4 series microcontrollers, the characteristics of the TIM6 and TIM7 basic timers are as follows:
- Mounted on the APB1 bus
- 16-bit auto-reload incrementing counter
- 16-bit programmable prescaler for dividing the counter clock frequency (modifiable at runtime), with a division factor between 1 and 65536
- Used to trigger the synchronous circuit of the DAC
- Generates interrupt/DMA requests when a counter overflow update event occurs
Common Timer Functions Reference
- HAL_TIM_Base_Init(): Initialize the timer base unit
- HAL_TIM_Base_DeInit(): Disable the timer, opposite of initialization
- HAL_TIM_Base_MspInit(): MSP initialization function, automatically called during timer initialization
- HAL_TIM_Base_MspDeInit(): Opposite of the previous function
- HAL_TIM_Base_Start(): Start the timer
- HAL_TIM_Base_Stop(): Stop the timer
- HAL_TIM_Base_Start_IT(): Start the timer in interrupt mode
- HAL_TIM_Base_Stop_IT(): Stop the timer in interrupt mode
- HAL_TIM_Base_Start_DMA(): Start the timer in DMA mode
- HAL_TIM_Base_Stop_DMA(): Stop the timer in DMA mode
Using Basic Timers to Make LED Blink
This experiment uses a basic timer to implement a timing function that toggles the LED state every 0.5 seconds.
Configuring the Basic Timer in CubeMX
First, open the Clock Configuration page in CubeMX and find and note the value of APB1 Timer clocks on the right side:
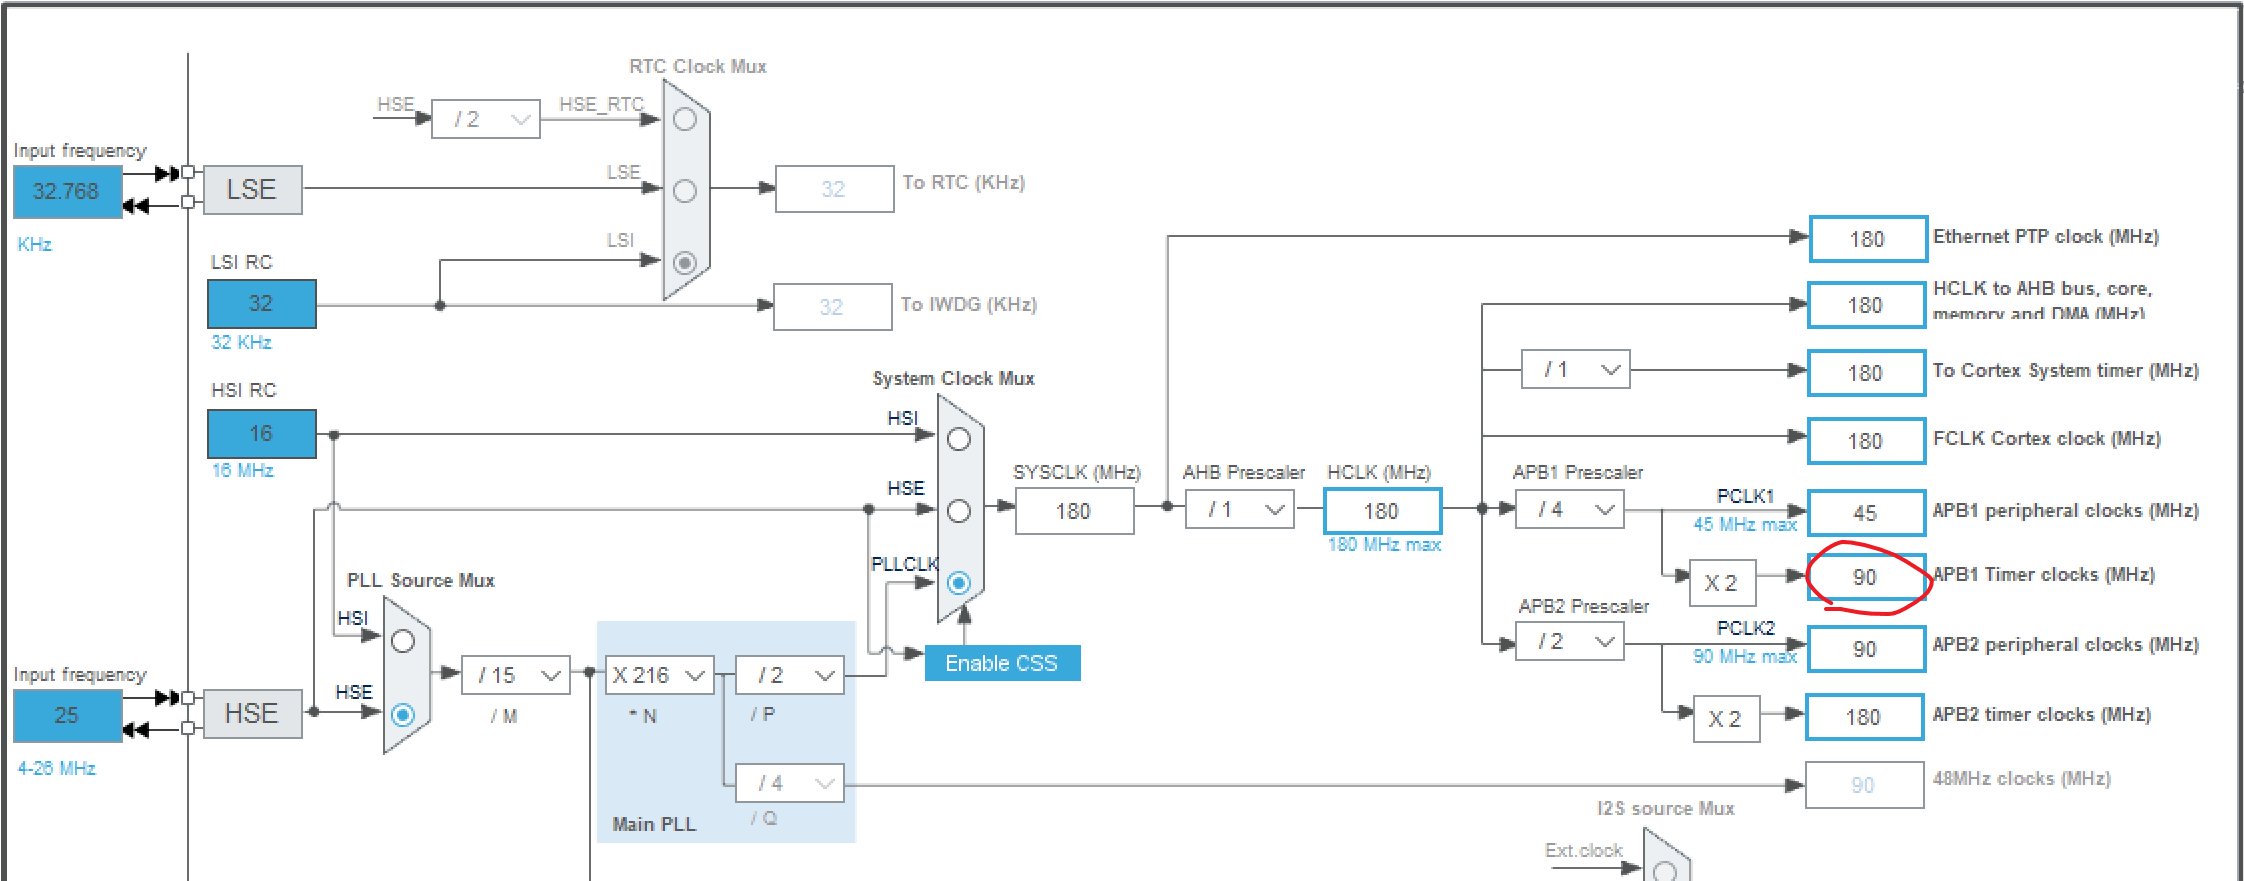
This is because TIM2-TIM7 and TIM12-TIM14 in the STM32F4 series are mounted on the low-speed APB1 bus, while TIM1 and TIM8-TIM11 are mounted on the high-speed APB2 bus. In this case, we are using the basic timer TIM6, so we need to check the speed of APB1 (which is 90 MHz after division and multiplication).
Next, find TIM6 in the Timer section on the sidebar, check the "Activated" box to activate the timer, and configure the following parameters below:
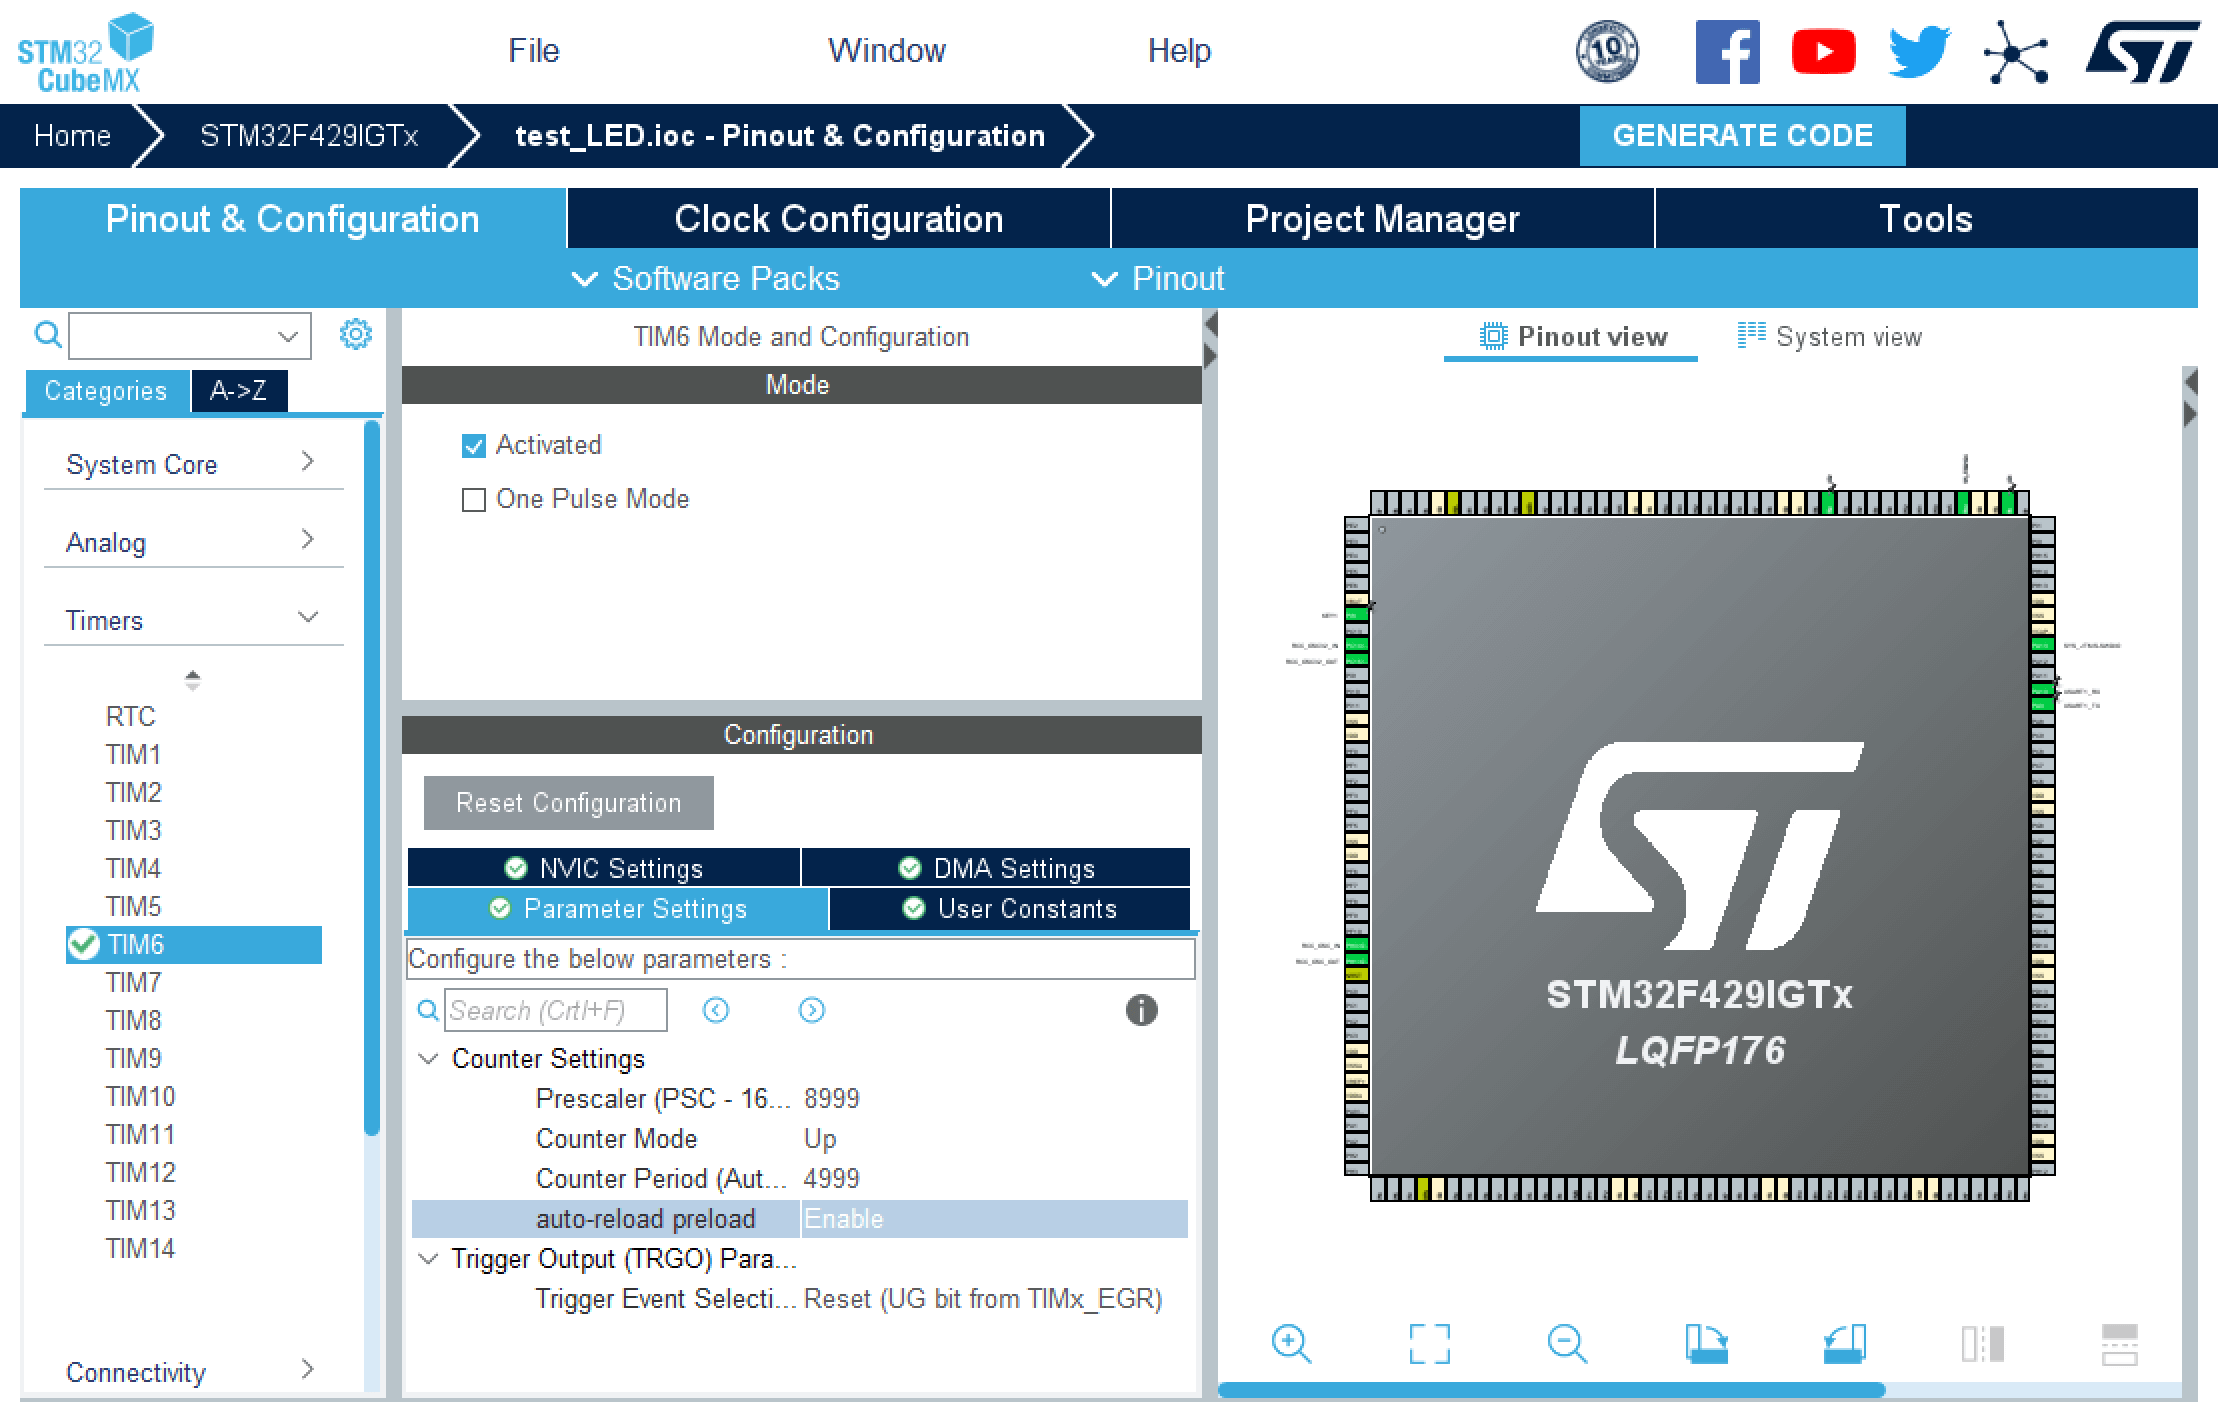
Meaning of each parameter:
- Prescaler: 8999
- Counter Mode: Up (counts from 0 to the prescaler value and then overflows)
- Counter Period: 4999
- Auto-reload preload: Enable (automatically reloads the initial value on overflow)
Since I am using a clock source of 90 MHz, I set the prescaler value to 8999 (which is a division of 9000), resulting in a frequency of 10 kHz (90 MHz/9000) after division. The counter period is set to 4999 (counts 5000 times per period), resulting in a period of 500 ms.
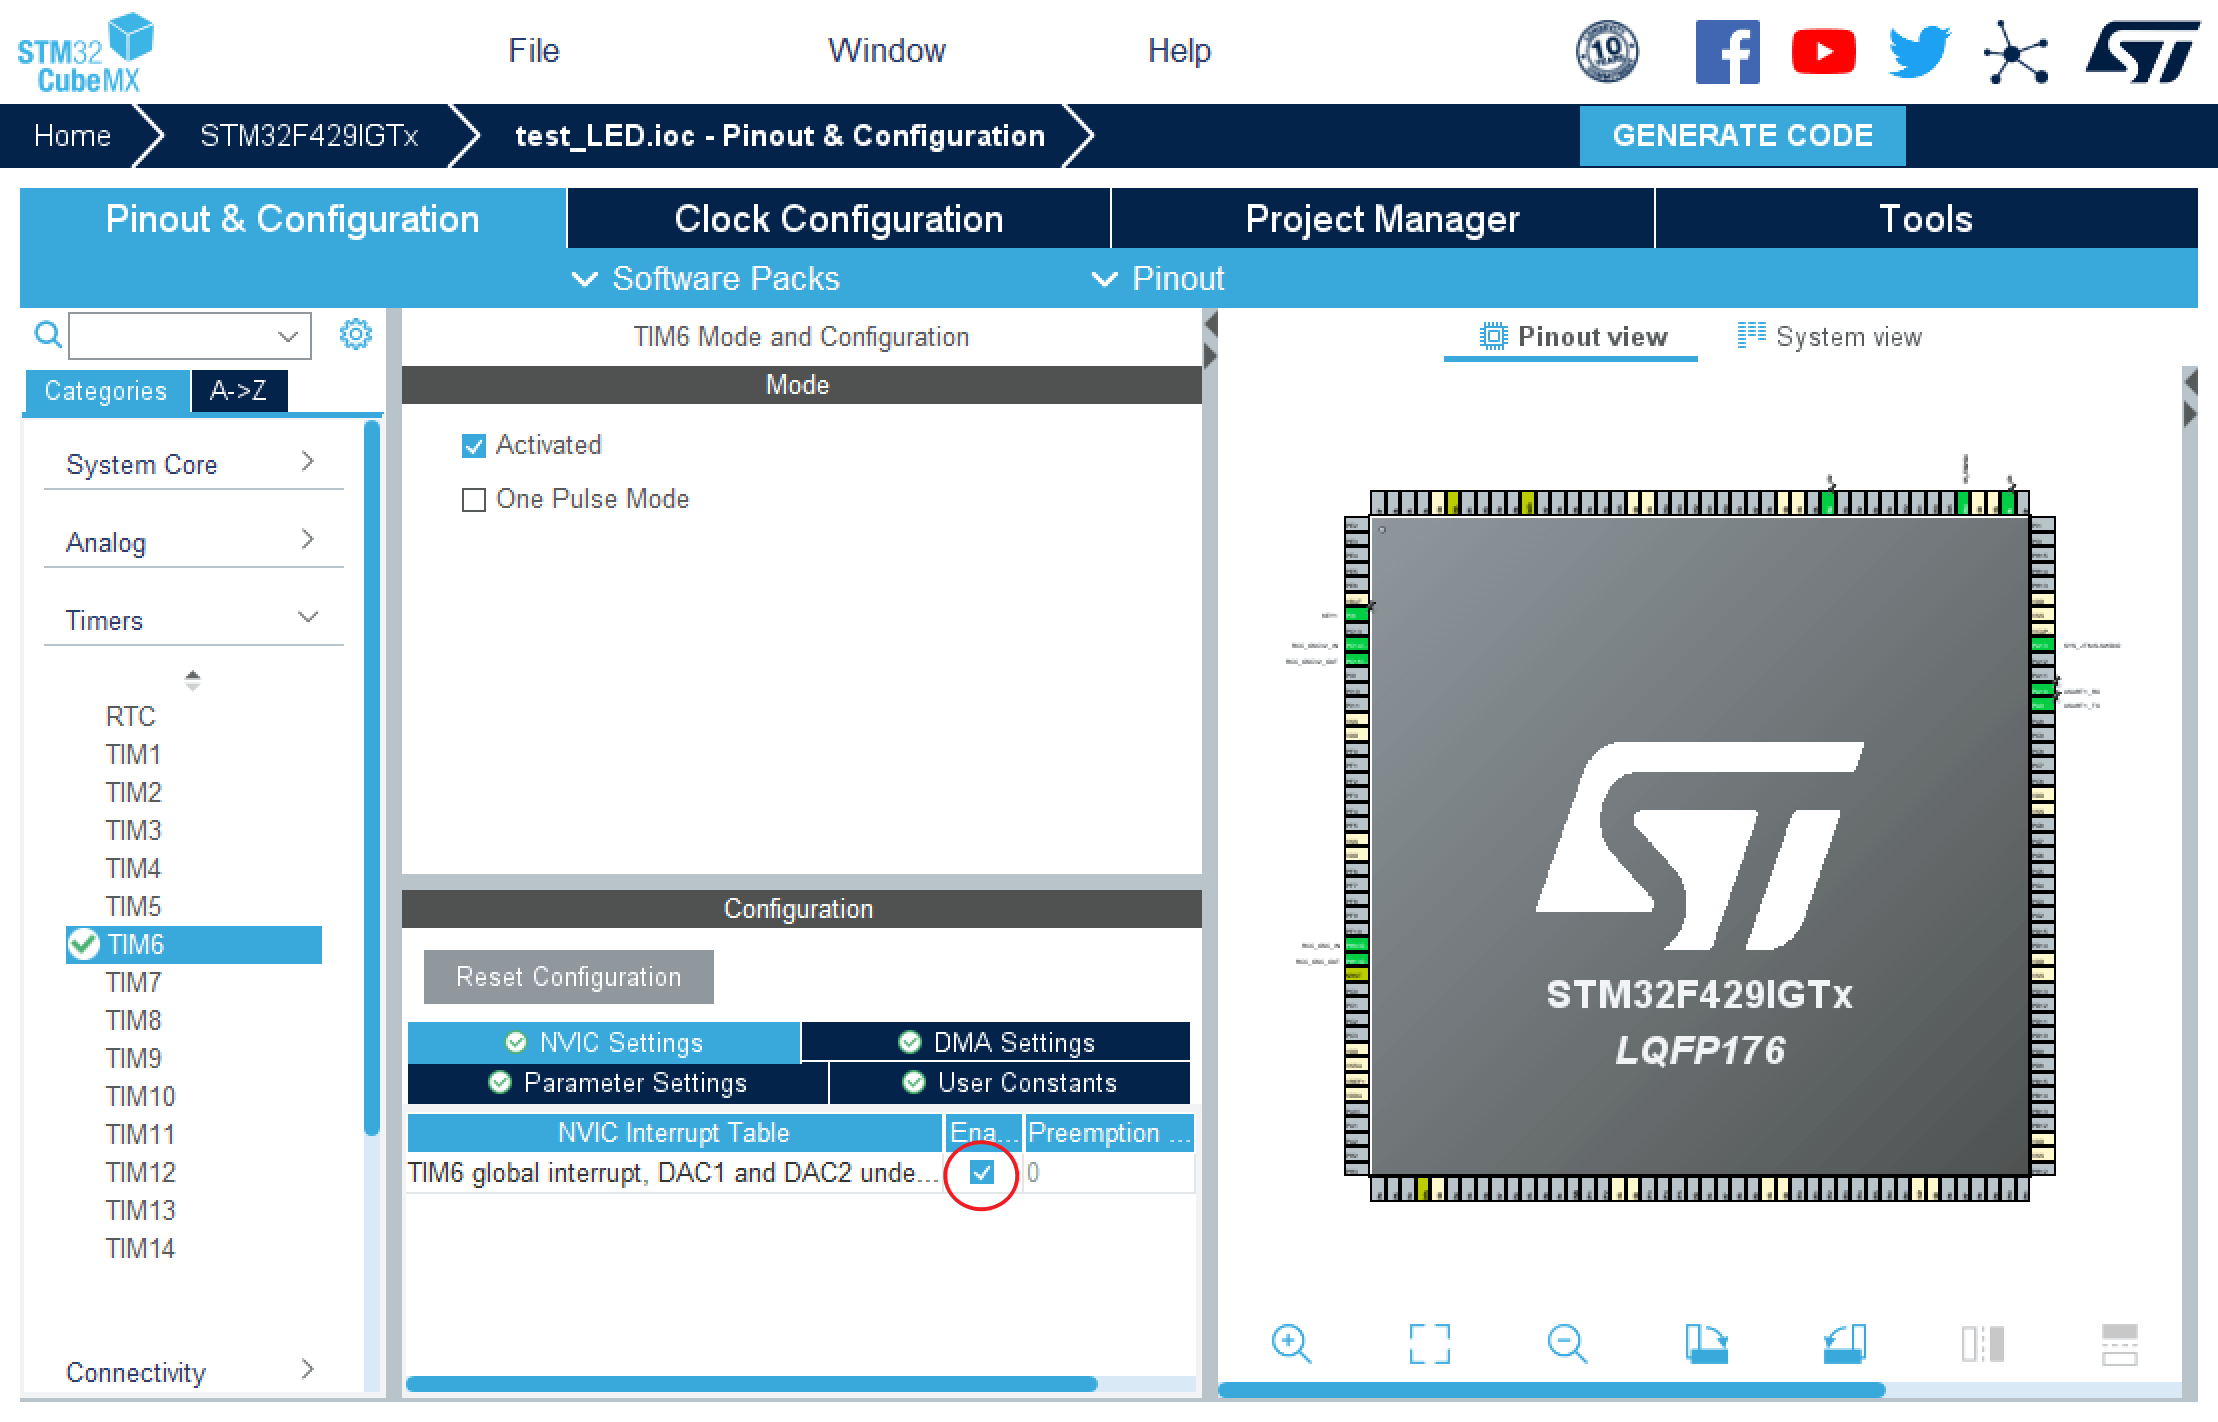
Then, on the NVIC tab, enable the interrupt:
Configuring the basic timer in the code
Enable the timer in main.c:
Add the callback function in stm32f4xx_it.c:
/* USER CODE BEGIN 1 */

void HAL_TIM_PeriodElapsedCallback(TIM_HandleTypeDef *htim)
{
    if(htim->Instance == TIM6)
    {
        HAL_GPIO_TogglePin(LED1_GPIO_Port, LED1_Pin);
    }

}

/* USER CODE END 1 */
For LED configuration, you can refer to the previous article HAL Library Development Notes - GPIO.
After downloading and burning, you will see the LED switching its state according to the preset 500 ms period (i.e., an overflow event occurs every 500 ms, and we toggle the LED in the callback function).
References and Acknowledgements
- STM32CubeMX Practical Tutorial (Part Four) - Basic Timer (Still Blinking)
- Advanced Part VI [Timer & PWM]
Original: https://wiki-power.com/ This post is protected by CC BY-NC-SA 4.0 agreement, should be reproduced with attribution.
This post is translated using ChatGPT, please feedback if any omissions.